Counter of Festivals

Ashok Blog for SQL Learners and Beginners and Experts

Friday 30 May 2014

How to know push/pull method of subscriptions in replication?

How to know push/pull method of subscriptions in replication?


Hi,

Publication

Push means that the agent will run on the distributor side of the replication topology, while pull will run on the subscriber side.

subscription 

Push means that the agent will run on the  subscriber side of the replication topology, while pull will run on the side distributor 

there are a few ways to see if a subscription is a push or a pull.

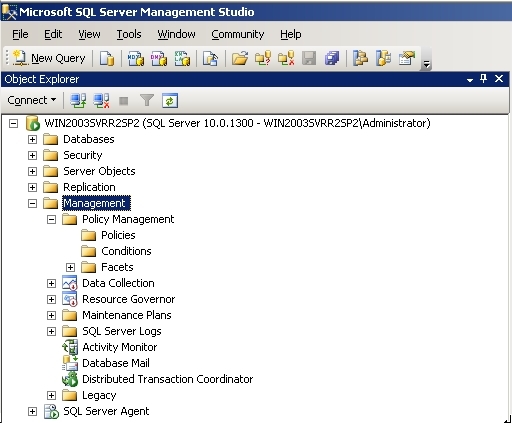
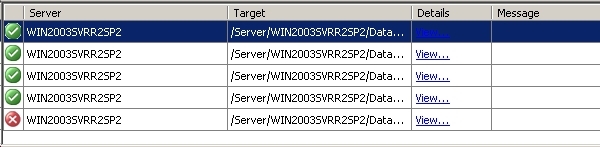
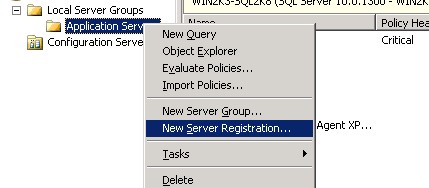
You can see this easily by opening up Object Explorer in SSMS and navigating to the replication folder. Open up "Local Publications" and find the publication you are interested in. All subscriptions are listed below the publication, the icon for each subscription will be either "fully coloured" or "washed out" to show a local subscription agent (push) or a remote subscription agent (pull).
The picture below shows a pull subscription (number 1) and a push subscription (number 2)
Subscriber Overview
You can also see this information in system tables. Something like this script, run on the publication server should provide you with some useful information:

    DECLARE @PublicationName sysname
    SET @PublicationName = 'MyPublication'
     
    SELECT pub.name Publication,
    art.name Article,
    sub.srvname DestinationServer,
    sub.dest_db DestinationDatabase,
    CASE WHEN subscription_type = 1 THEN 'Pull' ELSE 'Push' END AS SubscriptionType
    FROM dbo.syspublications AS pub
    INNER JOIN dbo.sysarticles AS art ON art.pubid = pub.pubid
    INNER JOIN dbo.syssubscriptions AS sub ON art.artid = sub.artid
    WHERE pub.name = @PublicationName

To know sysadmin in SQL Server

--------------------To know sysadmin in SQL Server------------------

USE master
GO

SELECT  p.name AS [loginname] ,
        p.type ,
        p.type_desc ,
        p.is_disabled,
        CONVERT(VARCHAR(10),p.create_date ,101) AS [created],
        CONVERT(VARCHAR(10),p.modify_date , 101) AS [update]
FROM    sys.server_principals p
        JOIN sys.syslogins s ON p.sid = s.sid
WHERE   p.type_desc IN ('SQL_LOGIN', 'WINDOWS_LOGIN', 'WINDOWS_GROUP')
        -- Logins that are not process logins
        AND p.name NOT LIKE '##%'
        -- Logins that are sysadmins
        AND s.sysadmin = 1
GO


EXEC sp_helpsrvrolemember 'sysadmin'


Monday 26 May 2014

SET QUOTED_IDENTIFIER ON

SET QUOTED_IDENTIFIER

set quoted_identifier session setting must be set to ON for the quotaion marks to be used for delimited identitfiers. The Defalut setting for SET QUOTED_IDENTIFIER is ON
but Older T-SQL code may rquire it to be set to OFF.
Setting quoted_identifier  to OFF causes SQL Server to interpret the quotation marks as string
Instead of identifiers.

---Standard identifiers-----
create table empsamp(eid int not null)

-----------Delimited identitfiers------

set quoted_identifier ON

create table sampemp("eid" int not null,[ename] varchar(300))

Table created.

select * from sampemp


set quoted_identifier OFF


create table sampdept("did" int not null,[dname] varchar(300))

Incorrect syntax near 'did'

---------------------------------------------------------------

Thursday 22 May 2014

SQL Server Performance Tuning Consideration

SQL Server Performance Tuning Consideration:

Ref:
http://blog.sqlauthority.com/sql-server-performance-tuning/
SQL Server Performance Tuning and health check is a very challenging subject that requires expertise in Database Administration and Database Development. Here are few pointers how one can keep their SQL Server Performance Optimal. I am often asked what can one do keep SQL Server Health Optimal and SQL Server keep on running very smooth.
Here is the quick list of the pointers which one should consider for performance tuning.

Server/Instance Level Configuration Check

Review all the SQL Server/Instance Level settings of the server and tune it based on system workload.

I/O distribution Analysis

Analyze the I/O of your system and decide the best distribution for the I/O load. Perform object level analysis and do performance tuning at table level. Reduce I/O performance bottlenecks and suggest optimal setting for read and write database. This is especially critical for databases that need to sustain heavy updates during peak usage hours.

SQL Server Resource Wait Stats Analysis

Wait Stat Analysis is very crucial for optimizing databases, but is often overlooked due to lack of understanding. Perform advanced resource wait statistics analysis to proactively reduce performance bottleneck.

Index Analysis

Indexes are considered valuable for performance improvements. Analyze all your indexes to identify non-performing indexes and missing indexes that can improve performance.

TempDB Space Review

Review the size and usage of your TempDB database.

Database Files (MDF, NDF) and Log File Inspection

Review all the files and filegroups of each of your databases and analysis them to identify any object or files that are causing bottlenecks.

Fragmentations and Defragmentations

Identify the optimal settings of your database files and tables to reduce fragmentation and reduce them.

Backup and Recovery health Check

Review all backup & recovery settings and procedures of your databases and understand the functions of the respective databases.

Log Reviews (Windows Event Logs, SQL Server Error Logs and Agent Logs)

Logs reveal many hidden facts. Identity the critical errors and resolve them.

Hardware Review

Review the hardware and and verify that it positively impact the performance or scalability of the database.

DBCC Best Practices Implementations

There are few DBCC commands to be avoided and few very crucial for system. Understand the usage of DBCC FREEPROCCACHE, DBCC SRHINKDATABASE, DBCC SHRINKFILE, DBCC DROPCLEANBUFFER, DBCC REINDEX, as well as the usage of few system stored procedures like SP_UPDATESTATS. If you are currently using any of the above mentioned and a few other DBCC maintenance task commands carefully review their usage.

Deadlock Detection and Resolutions Hands-On

Detecting deadlock is not very difficult, but to learn the tips and trick to resolve them requires an understanding of the issue and some experience. Understand the locking mechanism and resolve them.

SQL Query Tuning Tips

Ref:
http://beginner-sql-tutorial.com/sql-query-tuning.htm

SQL Tuning or SQL Optimization

Sql Statements are used to retrieve data from the database. We can get same results by writing different sql queries. But use of the best query is important when performance is considered. So you need to sql query tuning based on the requirement. Here is the list of queries which we use reqularly and how these sql queries can be optimized for better performance.

SQL Tuning/SQL Optimization Techniques:

1) The sql query becomes faster if you use the actual columns names in SELECT statement instead of than '*'.
For Example: Write the query as
SELECT id, first_name, last_name, age, subject FROM student_details;
Instead of:
SELECT * FROM student_details;

2) HAVING clause is used to filter the rows after all the rows are selected. It is just like a filter. Do not use HAVING clause for any other purposes. 
For Example: Write the query as
SELECT subject, count(subject) 
FROM student_details 
WHERE subject != 'Science' 
AND subject != 'Maths' 
GROUP BY subject;
Instead of:
SELECT subject, count(subject) 
FROM student_details 
GROUP BY subject 
HAVING subject!= 'Vancouver' AND subject!= 'Toronto';

3) Sometimes you may have more than one subqueries in your main query. Try to minimize the number of subquery block in your query. 
For Example: Write the query as
SELECT name 
FROM employee 
WHERE (salary, age ) = (SELECT MAX (salary), MAX (age) 
FROM employee_details) 
AND dept = 'Electronics'; 
Instead of:
SELECT name 
FROM employee
WHERE salary = (SELECT MAX(salary) FROM employee_details) 
AND age = (SELECT MAX(age) FROM employee_details) 
AND emp_dept = 'Electronics';

4) Use operator EXISTS, IN and table joins appropriately in your query. 
a) Usually IN has the slowest performance. 
b) IN is efficient when most of the filter criteria is in the sub-query. 
c) EXISTS is efficient when most of the filter criteria is in the main query.
For Example: Write the query as
Select * from product p 
where EXISTS (select * from order_items o 
where o.product_id = p.product_id)
Instead of:
Select * from product p 
where product_id IN 
(select product_id from order_items

5) Use EXISTS instead of DISTINCT when using joins which involves tables having one-to-many relationship. 
For Example: Write the query as
SELECT d.dept_id, d.dept 
FROM dept d 
WHERE EXISTS ( SELECT 'X' FROM employee e WHERE e.dept = d.dept);
Instead of:
SELECT DISTINCT d.dept_id, d.dept 
FROM dept d,employee e 
WHERE e.dept = e.dept;

6) Try to use UNION ALL in place of UNION. 
For Example: Write the query as
SELECT id, first_name 
FROM student_details_class10 
UNION ALL 
SELECT id, first_name 
FROM sports_team;
Instead of:
SELECT id, first_name, subject 
FROM student_details_class10 
UNION 
SELECT id, first_name 
FROM sports_team;

7) Be careful while using conditions in WHERE clause. 
For Example: Write the query as
SELECT id, first_name, age FROM student_details WHERE age > 10;
Instead of:
SELECT id, first_name, age FROM student_details WHERE age != 10;
Write the query as
SELECT id, first_name, age 
FROM student_details 
WHERE first_name LIKE 'Chan%';
Instead of:
SELECT id, first_name, age 
FROM student_details 
WHERE SUBSTR(first_name,1,3) = 'Cha';
Write the query as
SELECT id, first_name, age 
FROM student_details 
WHERE first_name LIKE NVL ( :name, '%');
Instead of:
SELECT id, first_name, age 
FROM student_details 
WHERE first_name = NVL ( :name, first_name);
Write the query as
SELECT product_id, product_name 
FROM product 
WHERE unit_price BETWEEN MAX(unit_price) and MIN(unit_price)
Instead of:
SELECT product_id, product_name 
FROM product 
WHERE unit_price >= MAX(unit_price) 
and unit_price <= MIN(unit_price)
Write the query as
SELECT id, name, salary 
FROM employee 
WHERE dept = 'Electronics' 
AND location = 'Bangalore';
Instead of:
SELECT id, name, salary 
FROM employee 
WHERE dept || location= 'ElectronicsBangalore';
Use non-column expression on one side of the query because it will be processed earlier.
Write the query as
SELECT id, name, salary 
FROM employee 
WHERE salary < 25000;
Instead of:
SELECT id, name, salary 
FROM employee 
WHERE salary + 10000 < 35000;
Write the query as
SELECT id, first_name, age 
FROM student_details 
WHERE age > 10;
Instead of:
SELECT id, first_name, age 
FROM student_details 
WHERE age NOT = 10;
8) Use DECODE to avoid the scanning of same rows or joining the same table repetitively. DECODE can also be made used in place of GROUP BY or ORDER BY clause. 
For Example: Write the query as
SELECT id FROM employee 
WHERE name LIKE 'Ramesh%' 
and location = 'Bangalore';
Instead of:
SELECT DECODE(location,'Bangalore',id,NULL) id FROM employee 
WHERE name LIKE 'Ramesh%';
9) To store large binary objects, first place them in the file system and add the file path in the database.
10) To write queries which provide efficient performance follow the general SQL standard rules.
a) Use single case for all SQL verbs
b) Begin all SQL verbs on a new line
c) Separate all words with a single space 
d) Right or left aligning verbs within the initial SQL verb

How do you grant execute permission to a single SP ? & How to view permission exists in SP?

How do you grant execute permission for a single stored procedure? and How to view permission has given correctly or not in objects?


Grant Permission Syntax:

GRANT EXECUTE ON <schema>.<object> to <user>;

GRANT EXECUTE ON dbo.getuserdetails TO testuser

getuserdetails----------SP Name
testuser-------------------Username

View Permission in Objects:

SELECT USER_NAME(P.GRANTEE_PRINCIPAL_ID) AS PRINCIPAL_NAME,

DP.PRINCIPAL_ID,

DP.TYPE_DESC AS PRINCIPAL_TYPE_DESC,

P.CLASS_DESC,

OBJECT_NAME(P.MAJOR_ID) AS OBJECT_NAME,

P.PERMISSION_NAME,

P.STATE_DESC AS PERMISSION_STATE_DESC

FROM SYS.DATABASE_PERMISSIONS P

INNER JOIN SYS.DATABASE_PRINCIPALS DP

ON P.GRANTEE_PRINCIPAL_ID = DP.PRINCIPAL_ID
where OBJECT_NAME(P.MAJOR_ID) in ('getuserdetails ')-------------------------Objects name
order by OBJECT_NAME,PRINCIPAL_NAME

Wednesday 14 May 2014

Linked Server in SQL Server

EXEC sp_addlinkedserver  
   @server=N'LS',             -- Remote Computer Name
   @srvproduct=N'',                 -- Not Needed
   @provider=N'SQLNCLI',            -- SQL Server Driver
   @datasrc=N'WELCOME-PC\MSSQL05';  -- Server Name And Instance

If the remote SQL Server does not have an instance name, then the @datasrc parameter nee only contain the remote server name and not the instance.


select * from Linkedservername.Databasename.Schemaname.Tablename

(Ex:)

select * from LS.testdb.dbo.Attribute


---------To test the linked server connectivity using script-------------
declare @srvr nvarchar(128), @retval int;
set @srvr = 'LS';
begin try
    exec @retval = sys.sp_testlinkedserver @srvr;
end try
begin catch
    set @retval = sign(@@error);
end catch;
if @retval <> 0

  raiserror('Unable to connect to server. This operation will be tried later!', 16, 2 );

---------------------------To know tables under linked server---------------------

sp_tables_ex 'LS'


Monday 12 May 2014

Policy Based Management in SQL Server 2008

Ref:

http://www.mssqltips.com/sqlservertip/1492/using-policy-based-management-in-sql-server-2008/


Policy-Based Management is indeed a new feature in SQL Server 2008.  It allows you to define and enforce policies for configuring and managing SQL Server across the enterprise.  Originally this feature was called the Declarative Management Framework but has since been renamed.  There are a number of terms that we need to define in order to begin to understand Policy-Based Management:
  • Target - an entity that is managed by Policy-Based management; e.g. a database, a table, an index, etc.
  • Facet - a predefined set of properties that can be managed
  • Condition - a property expression that evaluates to True or False; i.e. the state of a Facet
  • Policy - a condition to be checked and/or enforced
Policy-Based Management is configured in SQL Server Management Studio (SSMS).  Navigate to the Object Explorer and expand the Management node and the Policy Management node; you will see the Policies, Conditions, and Facets nodes:
Expand the Facet node to see the list of facets:
As you can see there is a rather comprehensive collection of facets predefined in SQL Server 2008, allowing you to manage just about every aspect of SQL Server.  Double click on a facet to see the actual list of properties in the facet; e.g. double click the Database facet:
These facet properties are used to specify a condition; e.g. AutoShrink = False means that you do not want to automatically shrink database files.  A policy specifies an expression that evaluates to True or False.  The expression can be made up of one or more conditions logically joined by And / Or.
In this tip we are going to gain an understanding of Policy-Based Management by walking through the following demonstration:
  • Create a Condition
  • Create a Policy
  • Evaluate a Policy
The demo steps below were only tested on the February, 2008 Community Technology Preview (CTP) of SQL Server 2008. 
Create a Condition
The starting point in Policy-Based Management is to create a Condition.  Right click on Conditions in the SSMS Object Explorer (under the Management | Policy Management node) then select New Condition from the menu.  Fill in the dialog as follows:
You select a single Facet for a Condition, then enter an Expression.  The Expression evaluates to either True or False.  This is the essence of Policy-Based Management which will test whether the Condition is True.
Create a Policy
Right click Policies in the SSMS Object Explorer (under the Management | Policy Management node) then select New Policy from the menu.  Fill in the dialog as follows:
The Check Condition drop down will include the list of conditions that you have defined.  You can check Every Database in the Against targets list, or you can click the glyph (between Every and Database) and define a condition.   Execution Mode can have one of the following values:
  • On Demand (this is the default)
  • On Schedule
  • On Change - Log Only
  • On Change - Prevent
The On Demand option only evaluates the policy when a user right clicks on the policy in the SSMS Object Explorer and selects Evaluate from the menu. 
The On Schedule option takes advantage of SQL Agent to execute a job on a particular schedule to check the policy.  After selecting On Schedule from the Execution Mode drop down list, you can click either the Pick or New button.
To pick an existing schedule, make a selection from the available options:
To create a new schedule, fill in the familiar schedule dialog:
When policy evaluation is scheduled, any violations are logged to the Windows Event Log.
The On Change - Log Only option evaluates the policy whenever the property in the facet is changed and any violation is logged to the Windows Event Log.  The On Change - Prevent option evaluates the policy whenever the property in the facet is changed and actually prevents the change; this option uses DDL triggers to enforce the policy.  Not all changes can be detected and rolled back by DDL triggers; the Execution Mode drop down list will include the On Change - Prevent option only when it is available.
One final note on the policy setup concerns the Enabled check box.  When the Execution Mode is On Demand, the Enabled check box must be unchecked; for all other options you must check the Enabled check box in order for the policy to be evaluated.
Evaluate a Policy
To evaluate a policy on demand, right click on the policy in the SSMS Object Explorer and select Evaluate from the menu.  The following is a partial screen shot of the output from evaluating a policy on demand:

The green check icon signifies that the policy evaluated to True for the databases shown.  Not shown above is a Configure button that allows the user to automatically fix a target where the policy evaluates to False.
Right click on a database in the SSMS Object Explorer and select Properties from the menu.  Click the Options page and change the AutoShrink property to True.  Evaluate the policy again and you will see the following output:
Note the red icon with the X indicating that policy evaluation failed for a particular database.  Not shown above is the Configure button which you can click to automatically change the AutoShrink property to comply with the policy.
Edit the policy and change the Execution Mode to On Change - Log Only.  Select a database and change the AutoShrink property to True.  Open the Windows Event Viewer, click on Application and you will see an event that was written when the policy evaluation detected the violation:
To test the On Change - Prevent Execution Mode for a policy, create a new condition and a new policy.  Create a new condition as follows:
Now create a new policy as follows:
This policy will prevent a table from being created if the table name does not begin with 'tbl_'.  Open a New Query window in SSMS and enter a create table script.  When you execute the CREATE TABLE script you will get the following error message and the table will not be created:


CREATE TABLE sample (
message varchar(256)
)
Policy 'Table Prefix Must Be tbl_' has been violated by 
'/Server/(local)/Database/demo/Table/dbo.sample'.This 
transaction will be rolled back. Policy description: 
''Additional help: '' : ''. Msg 3609, Level 16, State 1, 
Procedure sp_syspolicy_dispatch_event, Line 50
The transaction ended in the trigger. The batch has been aborted.

To Evaluate and Implement Policies in Multiple SQL Server Instances


Ref:

http://www.mssqltips.com/sqlservertip/1493/evaluate-and-implement-policies-in-multiple-sql-server-instances/

Policies in SQL Server 2008 can be evaluated on the instance on which it was created. But one of the most tedious task that a database administrator needs to do is to go thru each of the SQL Server instances he or she manages and implement those polices. What database administrators do most of the time is to implement the changes on a test environment before rolling it out to production. However, we do not want to individually export and import; we want to apply it to all the servers at once. We can use our test server as a configuration server, then define the other servers as targets for this policy. Fortunately, we have the ability to export those policies as XML files for storing and even for multi-instance evaluation.
Exporting a Policy
Referring to the example provided in the tip on Policy-based Management, let's export the policy to an XML file. Right-click on the policy and select Export Policy. I have selected the AutoShrink OFF policy, in this example. Save the policy on your local drive for reference. I'll use AutoShrink OFF.xml for my filename.
Now that we have a copy of the policy as an XML file, we can now use this to evaluate other SQL Server instances we manage. Let's start by creating a server group to register the instances we manage.
Creating a Server Group
In SQL Server Management Studio, open the Registered Servers tab. You can create a new server group for ease of management or register your servers under the Local Server Groups. In our case, let's just create a new server group named Application Servers.
Right-click Local Server Groups and select New Server Group. Specify Application Servers in the Group Name field and click OK .
Next, register your SQL Server instances on Application Servers group. In my example, I'll register three SQL Server 2008 instances. Right-click on Application Servers group and select New Server Registration.

                           
Once you have registered all the instances you need to manage, it's time to test the policy against them all at once.
Evaluating the policies against multiple instances
Since you already have your defined policy as an XML file, we can use that as a reference to evaluate the instances registered on your server group. Right-click on Application Servers group and select Evaluate Policies.
This will open up the Evaluate Policies - Application Servers window. On the Source field, click on the ellipses button and select the AutoShrink OFF.xml file which you generated.
Make sure that the AutoShrink OFF policy checkbox is checked. Then, click the Evaluate button. You will notice that the policy has been evaluated on not just one but all registered instances. From my registered servers, you will notice that one instance has at least one database which is out-of-compliance, in the case of the WIN2K3-SQL2K8\STAGINGinstance, the MetroDB database, as the red icon on the AutoShrink OFF policy indicates.
You can opt to implement the policy one at a time or you can do it on all instances at the same time. You can click theConfigure button on the non-compliant database to apply the policy on one database at a time or click on theConfigure button on the AutoShrink OFF policy to apply the policy on all databases on all registered instances. This makes it easy to configure multiple servers at the same time. By doing so, you'll see that all the databases on all my registered instances are now compliant

Friday 9 May 2014

To Know SQL Server Permissions of Objects like SPs, Views etc.

To Know SQL Server Permissions of Objects like SPs, Views etc.

TSQL:

SELECT USER_NAME(P.GRANTEE_PRINCIPAL_ID) AS PRINCIPAL_NAME,

DP.PRINCIPAL_ID,

DP.TYPE_DESC AS PRINCIPAL_TYPE_DESC,

P.CLASS_DESC,

OBJECT_NAME(P.MAJOR_ID) AS OBJECT_NAME,

P.PERMISSION_NAME,

P.STATE_DESC AS PERMISSION_STATE_DESC

FROM SYS.DATABASE_PERMISSIONS P

INNER JOIN SYS.DATABASE_PRINCIPALS DP

ON P.GRANTEE_PRINCIPAL_ID = DP.PRINCIPAL_ID
where OBJECT_NAME(P.MAJOR_ID) in ('all_employeeRough')
order by OBJECT_NAME,PRINCIPAL_NAME

Output: